LEARNING PATHWAY BASED ON SCIENTIFIC CONCEPTS
The Force of the Earth
Overall aims:
- Knowledge and respect about the natural world, phenomena, and Earth resources;
- Discover the layers of the Earth and its own dynamics;
- Know natural disasters’ consequences;
- Understand the natural world we live in;
- Distinct of geometric figures;
- Develop fine motor skills;
- Express emotions through plastic creations.
Intended learning outcomes:
The child will be able to:
- Recognize different kinds of volumes and shapes and relate them with real objects;
- Recognize natural phenomena;
- Know the energy and force of nature, water, and geosphere’s layers;
- Develop different sculptures;
- Differentiate natural materials and recyclable and recycled material.
Evaluation:
Final assessment through a simple oral test with questions related to learning outcomes (the teacher can use photos, books, and the materials that children have created to formulate the questions).
Activity 1: Do you know what an atmospheric phenomenon is? Can you recognize the force of nature in all of them? Do you recognize a natural material? Do you know what a recyclable and recycled material is?
Activity 2: Do you know what a volcano is? How does it erupt? Do you know how to build a simulated volcano? How does it work?
Activity 3: Do you know what an earthquake is? How does the ground shake? Do you know how to build an earthquake model? How does it work?
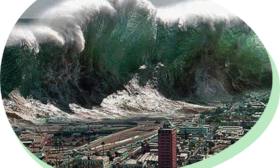
Activity 4: Do you know what a tsunami is? How will you feel if you were inside one of them? What happens if an animal is swept away by a tsunami?
Pathway structure:
The path is composed of 4 activities in total. A period of one month is foreseen to complete the whole learning pathway.
Stage I – Sculptures with pieces of nature
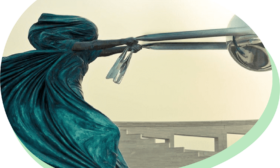
Look at the works of the series “The Force of Nature” by Lorenzo Quinn (the teacher shows children the video file about Lorenzo Quinn’s work). Select a Lorenzo Quinn’s work (the teacher asks children to select one of the sculptures made by Quinn sculptor). Children try to reproduce the work selected using natural materials (the teacher and -if possible- support teacher conduct three sessions of around 30’of individual art’s work)
- Sculptures with pieces of nature – Create a sculpture that represents the force of nature
Stage II – The volcano erupts
Watch the video files (a) about what a volcano is and how it erupts and (b) about how to make a volcano (the teacher shows to whole group the two video files -15 minutes in total-). Try to build a volcano and reproduce how it works (the teacher and -if possible- the support teacher help the children to make a volcano and reproduce the eruption through a chemical reaction. Two sessions of 45’ in small groups of 3-4 children).
- The volcano erupts – Build a volcano and simulate an eruption

Stage III – An earthquake in action
Watch the video file about what an earthquake is and how the ground shake (the teacher shows video file -4 minutes- to the whole group). Build an earthquake model and reproduce the movement of the earth’s crust follow the video file instructions (the teacher and -if possible- the support teacher help the children to make a model and reproduce the earthquake movement. One session of 45’ in small groups of 3-4 children).
- An earthquake in action – Make a model of an earthquake

Stage IV – Tsunami in sight!
Watch the video file about what a tsunami is and what causes it (the teacher shows the video file -4 minutes- to the whole group). Select a marine animal: jellyfish, crab, octopus, squid, shark, dolphin…
Imagine and draw a small story as if you were the animal selected and you were inside a tsunami (the teacher explains the activity and tries to put the children in the situation so that they express their feelings. One session of 50’of individual work). Explain to your classmates the story you have drawn. All the group. One session of 50’, 2 minutes each child.
- Tsunami in sight! – Draw a story about a sea animal in a tsunami